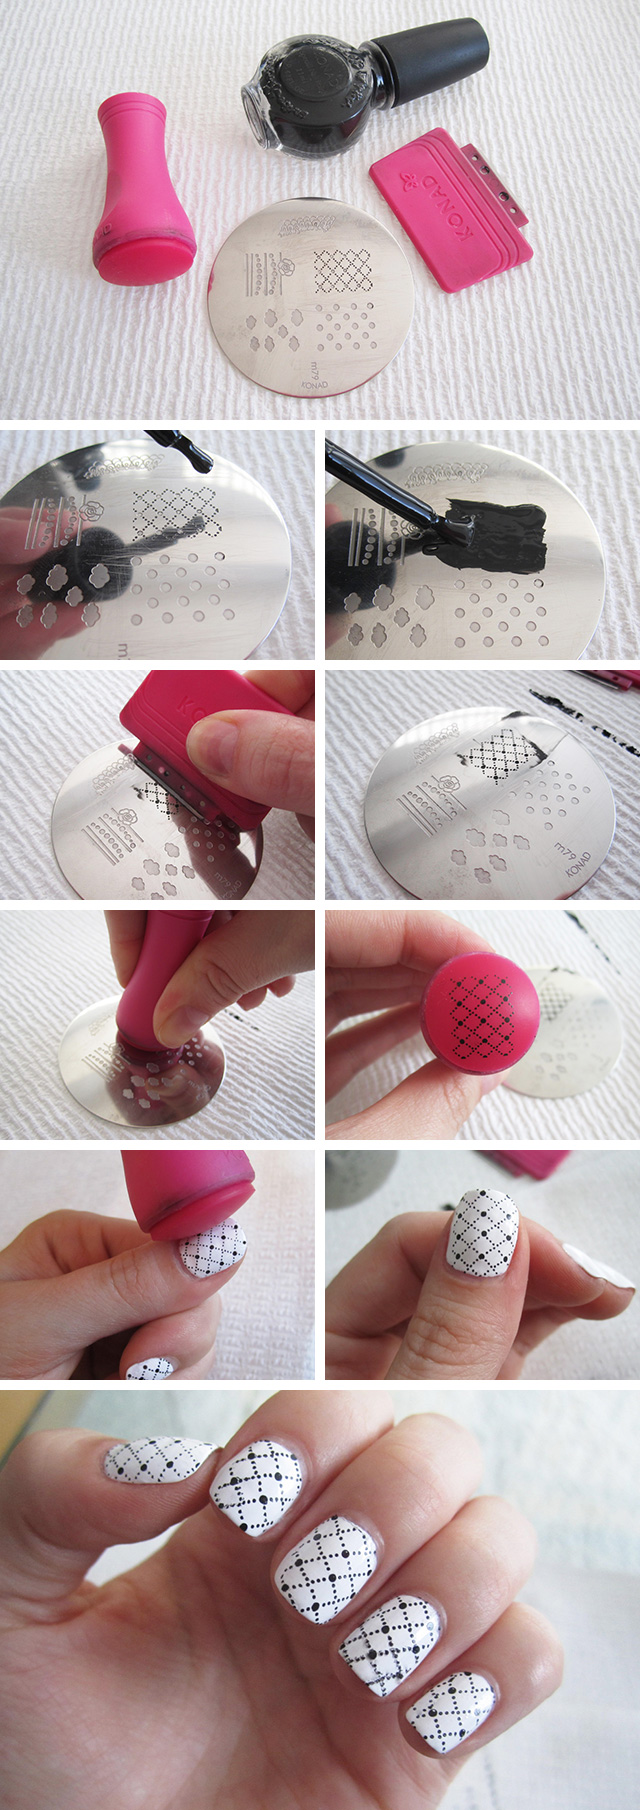
If you are new to the world of Konad nail stamps, keep reading for a step by step tutorial on how to create easy nail art!
I started using Konad nail stamps last year when friend Melissa showed me how to use them. Check out her awesome nail stamp tutorial here!
Nail stamps are a great way to make your nails look fancy without having to hand paint them or use nail stickers. You just stamp them on, and you don’t have to worry about stickers peeling off or having a steady hand. I am so much respect for people who can hand paint their own nail designs, but these Konad nail stamps are super easy and look amazing.
I started by buying the Basic Stamping Kit for $15.99 which comes with 1 special nail polish (white), 1 image plate, 1 stamp & 1 scraper. This is all you need to get started! I ordered an additional nail plate – M79 which I used to create this look.
to play around with as well for $6.99 each.
Steps:
- Apply a thick layer of polish directly on the decal. I suggest using a paper towel to protect whatever surface you are using
- Quickly use the scrapper to remove any excess polish. This is ‘special’ polish, so it is thicker and dries quickly. This is great for allowing the rubber stamper to pick up the polish but it also means you have to work fast.
- While applying pressure, roll the stamper over the decal from right to left
- Apply the stamp to your nail from right to left as well. It will take some time to learn how to properly line it up to your nail, don’t be discouraged if you have to redo the same nail a few times at first!
- Repeat for each nail additional nail. Let dry for at least 30 minutes before adding a top coat. You will need to use nail polish remover and a cotton pad to clean the rubber stamper and the nail plate after each nail.
- You are left with unique, dramatic nail decals that you’ll love!

[…] via meganjoy.ca […]