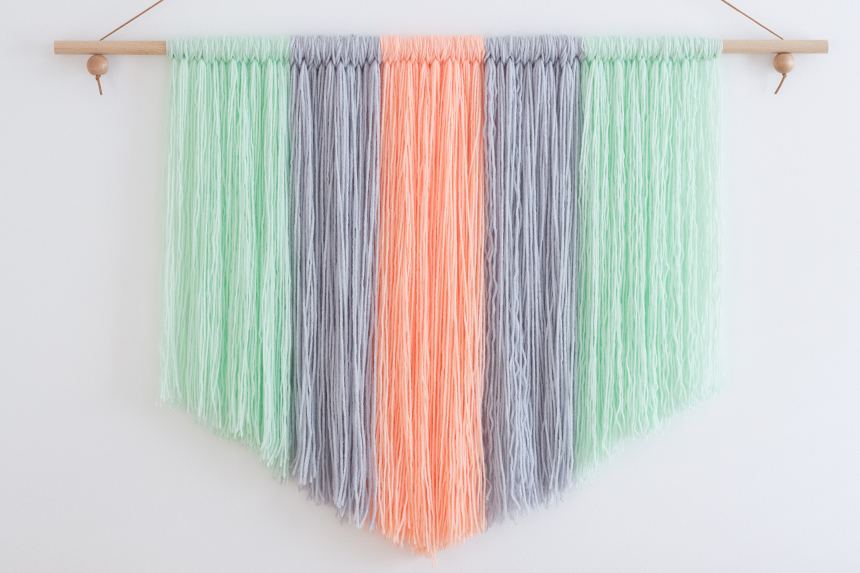
Guess what? I completed my first DIY project in a long time. A REALLY long time. I fact, I think the last one I did was the Pink Ombre Mason Jars for Piper’s nursery and that was almost 3 years ago! :0
I am proud to say that I finally made a yarn wall hanging. I’ve seen these all over Pinterest and have been wanting to make one for a while. It was surprisingly easy and the supplies were affordable too. My husband has a few woodworking tools that helped me along but you can totally complete this without any tools at all. I’ll show you how!
What you’ll need:
- yarn in the colours you choose
- rope or a strong string
- dowel, OR wood pole OR metal tube
- 2 wood beads (optional)
- scissors

I knew I wanted grey, coral/peach and mint so that it would match the existing colour scheme in Piper’s room. I got these from Amazon for between $5-$7 per skein (ball of yarn lol). I bought two of each colour but I ended up only needing one of each. Depending on the length and size you may want to order more, but if you’re making a small/medium size hanging one ball should be fine.
For the dowel, you can find it at any hardware or craft store. I got mine from Home Depot but they also sell them at Michael’s. I’ve even seen people use a stick straight from nature for a more rustic look! I also used wood beads as an accent but those are optional!

I used this suede string to hang it. It came in a pack of 4 different colours for about $7. Each one is 2 meters (or 2.2yards) and it was more than long enough for this project. You can also use rope or a sturdy string. Whatever will be strong enough to hold the weight of your project.

Start by measuring the length of the yarn. Remember to double the length because you will be looping it over the dowel. After I started I didn’t really like the look of doing one piece of yarn at a time so I grouped 5 pieces together for each loop.
You can try out different ways of knotting the yarn but I found just making a loop, pulling the yarn over the dowel and poking it back through was the easiest.

My husband drilled holes in the dowel and the beads so I could feed the string through both and knot it underneath. You can skip this step and simply wrap the string around the dowel several times and then knot it (see and example here and here).


The final step is to cut the ends of the yarn into whatever shape you’d like. I try to avoid using nails on the walls when possible, so I just used these Command Small Clear Hooks to hang it. You can leave the ends more straight or cut it on an angle like I did here. You don’t have to be perfect so don’t stress out about this part too much. Mine is definitely not perfectly cut but you really can’t tell once it’s up on the wall.

And that’s it! I hope you enjoyed this tutorial and found it helpful. Please let me know if you end up trying this DIY project yourself!
*This post includes affiliate links
Hillary Harper says
Such a fun DIY project! It goes perfectly in the nursery where it looks like you put it 🙂